Another You Tube Video showing how to make a little girls banner.. my instructions are on this blog.
http://www.youtube.com/watch?v=mkaac1RSbfQ

Monday, October 18, 2010

You Tube Video Showing How To Use Layers Feature With Your Gypsy
Here is a little quick video showing you how to use the Layers feature with your Gypsy.
http://www.youtube.com/watch?v=mKpuiGfjKNw
http://www.youtube.com/watch?v=mKpuiGfjKNw
You Tube Video Showing Some Of My Cards
Here is a link to my you tube video showing some of my cards live. You will be able to see some of them better here. Enjoy! http://www.youtube.com/watch?v=v_poB7oK3u0
My Pink ATG Gun..

This is my new Pink ATG Gun!! I added some Black & Creme Polka Dotted Paper from Die Cuts With A View La Creme Stack Pack to spice it up a bit. It makes it so much cuter and plus, I don't have to look at the spool of tape when I use it. All I did was trace around the outside and cut to fit. Very simple yet so cute.
A Child's Year Wagon Card

So this morning I was looking to make another card but did not know what I wanted to make. I decided to use my A Child's Year Cricut Cartridge yet again. This is my favorite cartridge so far. It has so many images of so many different things. Too cute! This is how to make this simple yet adorable card.
Your finished card size will be: 4 1/4" x 5 1/2"
If you take a piece of 8 1/2 x 11 piece of black cardstock and cut it down the middle you will have enough for 2 cards. This card opens like a book, from left to right.
This image is on page 45 in your handbook.
I cut out the image at 2 1/2" in black and the shadow at 2 1/2" in white cardstock
The red mat is cut to size 4' X 5 1/4". One of my tips is to cut your mats 1/4" smaller then your card or other mats.
I then embossed the red mat using my Cuttlebug. I chose the Stars embossing folder.
The black polka dot paper is from Die Cuts With A View and is cut at size 1 1/2" x 4".
I used black ribbon and adhered it to the black polka dot paper then adhered the polka dot paper to the red mat. After that is when I taped my red mat to my card. Easy peasy!
The little Cherish tag was in my stash from along time ago. It is from Elements by Creativity Inc.
There were 4 sayings in the pack. Love, Celebrate, Cherish & Friend. I chose Cherish & Friend for my 2 cards. Another tip is when I make a card I always make 2 at a time. It is just easier to cut everything out at the same time and put them together at the same time. Then I have 2 cards to use whenever.
Well, that's it! This was a very simple card to make. It only took me about 20 minutes from start to finish to make the 2 cards.
Materials used:
Black Cardstock
Red Cardstock
White Cardstock
Black and Cream Polka Dot Paper
A Child's Year Cricut Cartridge
Cuttlebug & Stars Embossing Folder
Black Ribbon
Cherish Clear Acrylic Tag
How to make a Little Girls Banner using All Mixed Up & Alphalicious Cartridges

I made this little girls banner today for my daughter Hallie's best friend Erin. Here is what you will need to make this banner.
I used my Gypsy to make things a whole lot easier. I added 4 layers so that when it came time to cut out the design I would not have to keep pulling out different cartridges and I could cut it out all at once.
The size of the flower striped circle banner was cut out at 11.25" on my Gypsy
The middle circle was cut out at size 10 1/4"
The letters E R I N were cut out at size 6 1/2" each
Materials needed:
The banner is on your All Mixed Up Cartridge
The letters are on the Alphalicious Cartridge
The paper I used is from Die Cuts With A View the Garden Stack &
Die Cuts With A View Whimsy Stack Pack
I used some lighter blue cardstock that I had on hand
Blue Ribbon
I used my Crop-A-Dile Big Byte to punch holes in the banners. I stacked them all up together and punched the holes at one time that way they all matched perfectly.
This was really simple and fun to make. The little flowers on top were from the Color Me Crazy Flower Pack. I used some light blue ink and some silver ink to ink them up for dimension and then placed a brad in the center of the flower. If you have any questions please feel free to email me or leave a comment. I will do my best to answer what I can.
Tuesday, October 12, 2010
3 x 3 Little Note Card Set
I made these little 3 x 3 note cards as a gift for my friend Lynda. There are 6 in total with little envelopes to match. I used the Storybook Cartridge for the "L" and the Scalloped Circles.
Your finished size is 3 x 3.
Take 3" x 6" cardstock and Score at 3"
Fold at the crease
Take a Pink Cardstock (or whatever colors you want to use) and cut at 2 3/4" x 2 3/4"
Black cardstock mat size is 1 1/2" x 2 3/4"
The letter "L" is cut out at 2"
The scalloped circle is cut out at size 2 3/4"
To make the envelopes start with 5" x 5" paper (I just used pink colored copy paper)
Score at 1 7/8" on all corners
Fold and tape. Viola, you are all finished and you have an adorable little note set. I stacked up the note cards and envelopes and tied a pretty pink ribbon around the stack and presented it that way.
Materials needed to make these:
Storybook Cartridge
Pink Cardstock
Off White Cardstock
Black Cardstock (I used patterned paper)
Creme Colored Ribbon
Adhesive

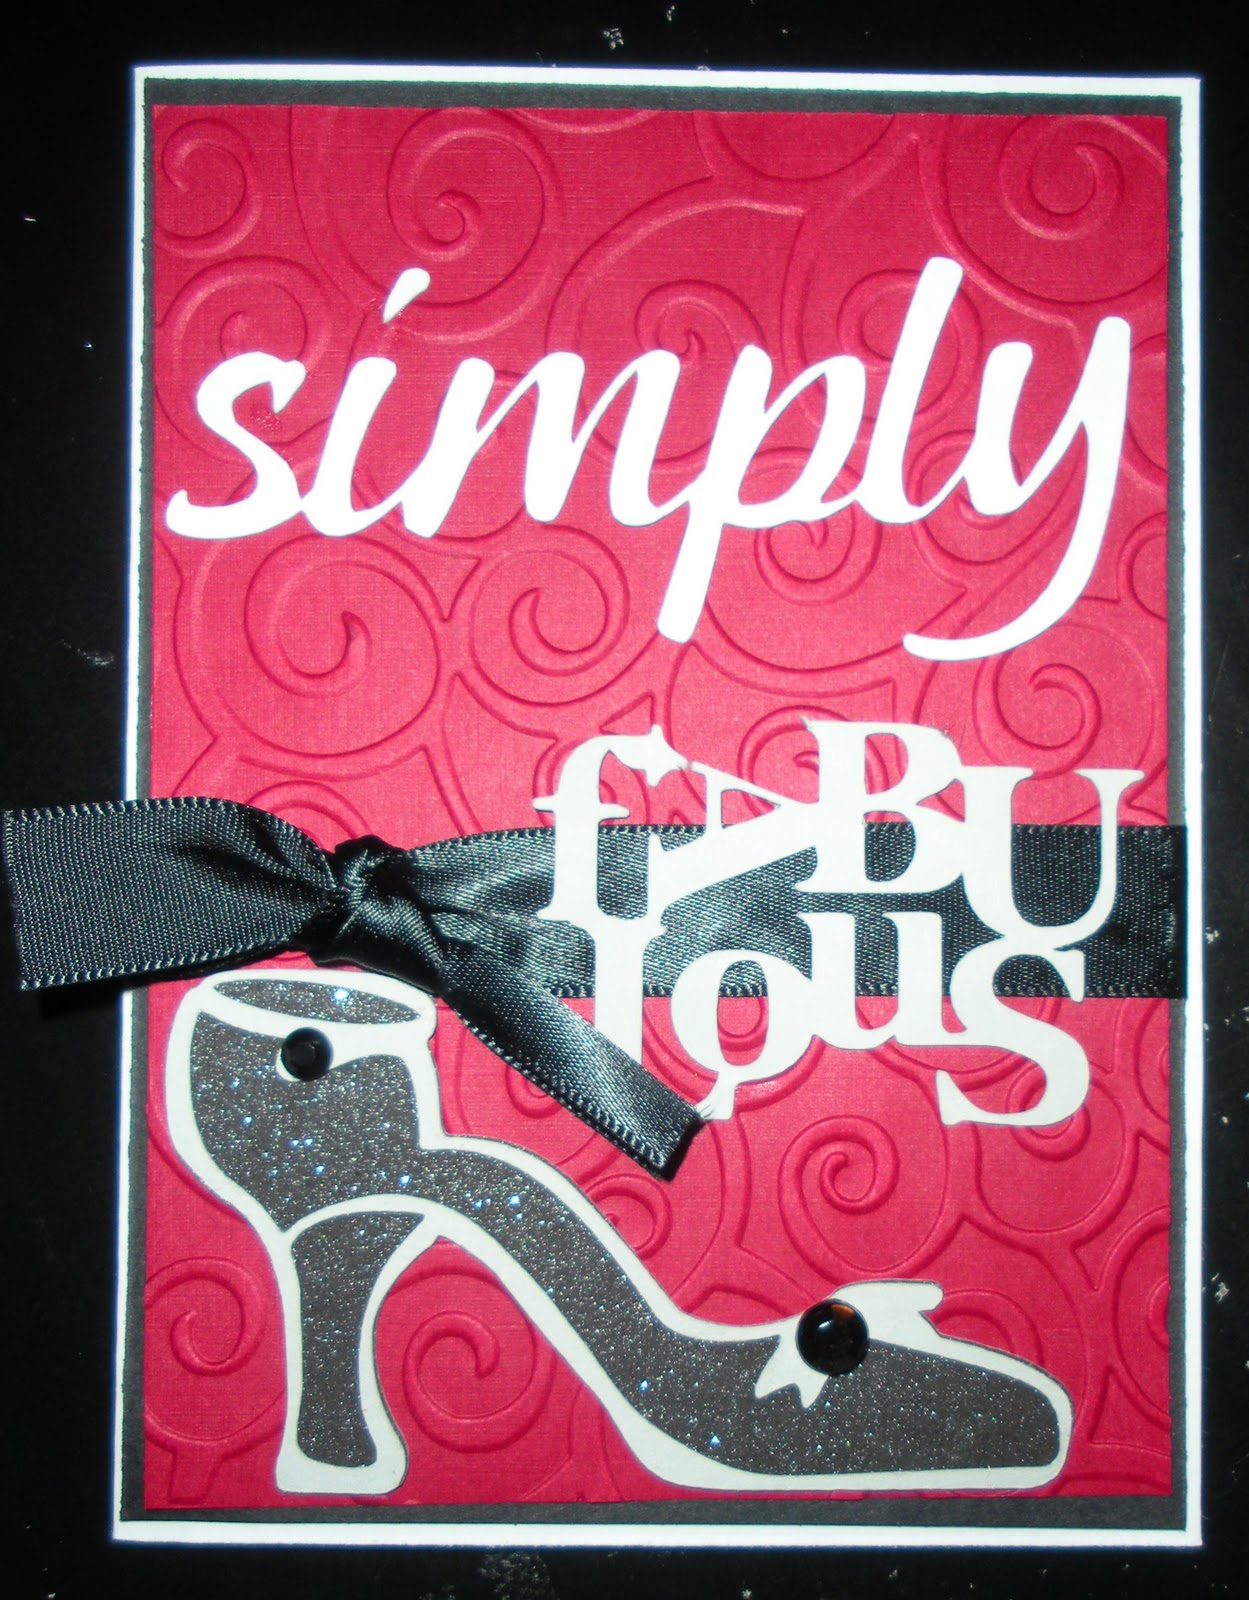
Fabulous Shoe Card
This card is inspired by another blog called Cardz Tv. I decided to make it because it turned out so cute. Mary is very talented and creative.
You will need:
Your Graphically Speaking Cartridge
Black Cardstock
Red Cardstock
White Cardstock
Gray Cardstock
Cuttlebug Divine Swirls Embossing Folder
Glitter Paper, I used black from Die Cuts With A View, Glitter Cardstock Paper Stack
Black Ribbon
2 Black Gems for shoe
The finished card size is 4" x 5 1/2"
Black mat size 4 1/8" x 5 3/8"
Red mat size 4" x 5 1/4"
Cut shoe out at 2" in the Black Glitter Cardstock
Shoe is on page 63, Cut out using the Icon feature and the Icon Blackout feature
The word Fabulous - using the Jumbled feature on page 63, is cut out at 1 1/2"
The phrase Simply is on page 49 and is cut out at 1 1/2"
I used the Divine Swirls Embossing Cuttlebug Folder to give it some depth and dimension.
That is all there is to this little card.. so cute.
Rock Princess Skull Card
I was looking at my Rock Princess Cricut Cartridge this morning and was looking for something cute to make. This card is actually shown in the handbook on page 7 & 8. The directions are printed in the book but I am going to go ahead and write them down for you.
This is how you make this super cute skull card.
Materials needed:
Rock Princess Cartridge
Cardstock: Black, White, Gray, Light Pink, Medium Pink, Dark Pink, Pink Glitter & Pink Patterned.
Ribbon 1/2 yard of two black patterned and one pink. (I used two pink and one black)
Paper Trimmer
Foam Squares
Adhesive
The skull & bow are on page 68, the cross bones is on page 69, the phrase Rebel is on page 58.
Step one: Cut one 12" x 6" block of black cardstock. Fold in half to create card base.
Cut one 5 3/4" x 5 3/4" block of pink patterned paper cardstock.
Tie ribbons around the block as shown. Adhere to card front using foam squares.
Step two: Cut one 4 1/2" x 4 1/2" block of black cardstock. Cut one 4" x 4" block of pink glitter cardstock. Layer together. Adhere to card front using foam squares.
Step three: Cut skull. Using gray cardstock, cut one 3" <skull1>. Repeat cut using white cardstock and Layer 1 feature. Repeat cut using light pink cardstock and Layer 2 feature. Repeat cut using black cardstock and Shadow feature. Using black cardstock, press Shift and cut one 3" <skull1-s>. Repeat cut using dark pink cardstock and Layer 1 feature. Repeat cut using medium pink cardstock and Layer 2 feature. Layer together using adhesive and foam squares. Adhere to card as shown.
Step four: Cut REBEL. Using black cardstock, select Phrase feature and cut one 2' <Headphns>. Using dark pink cardstock, select Phrase feature, press Shift, and cut one 2" <Hdphns-s>. Repeat cut using gray cardstock and Shadow feature. Layer together. Adhere to card as shown using foam squares.
This card was really fun to make. I actually made 2 at one time. I also used a little baby pink button for the center of the bow on the skull. I think it made it alot cuter. You could use glitter, a pink gem (I ran out of these so that is why I used the button). I also ran the black block of cardstock through the cuttlebug using one of the embossing plates. I am sorry that I do not know the exact name of it but it has alot of swirly flowers and a heart in the center. If you have any questions please let me know and I will do what I can to help. Have fun!

Another Forever Young Purse
My 9 year old daughter Hallie asked me to make her a purse today. She picked out the paper which you cannot tell by this picture is very heavy duty and very glittery and beautiful. The colors are a deep rich brown and a light blue. Here is what you need to make this little bag.
Obviously you need your Forever Young Cartridge. This bag in on page 47 of your handbook.
I turned the dial all the way up to 23" and hit the Fit To Page Button and it will calculate the size for you. This purse is called the Sunglass purse.
To get started hit the Purse button and cut out your bag.
To cut out the liner that covers the Sunglass Opening hit the Shift key on the Purse button.
You then need to cut out your sunglasses. You do not need to press any buttons for the sunglasses.
I ended up cutting out the Sunglasses and the Sunglasses in the Shadow feature.
To do this you hit the Shadow key.
Then you need the Layer button to cut out the Lenses.
That's it. The hardest part is over.
To put the purse together you should use some heavy adhesive like your ATG Gun or even a Glue Gun.
The material's I used are:
Forever Young Cricut Cartridge page 47
Die Cuts With A View "Garden Stack Pack"
Die Cuts With A View "Glitter Cardstock Stack Pack" in baby blue
Black cardstock for the sunglasses shadow and lens
A Button to put on top of the closure, I used a basic blue button that I had in my stash
Velcro for the closure, this allows you to open the purse without tearing the bag
Your ATG Gun or a Glue Gun
Blue Ribbon to tie around the handle
I filled this little bag up with mini finger nail polish, mini lip gloss, mini eye shadow for my 9 year old daughter Hallie. This would be a perfect little treat bag for a little girls birthday party or for any occasion. Have fun and I would love to see your finished bag. Thank you so much for looking at my project. I had such a great time making this for Hallie.

Subscribe to:
Posts (Atom)